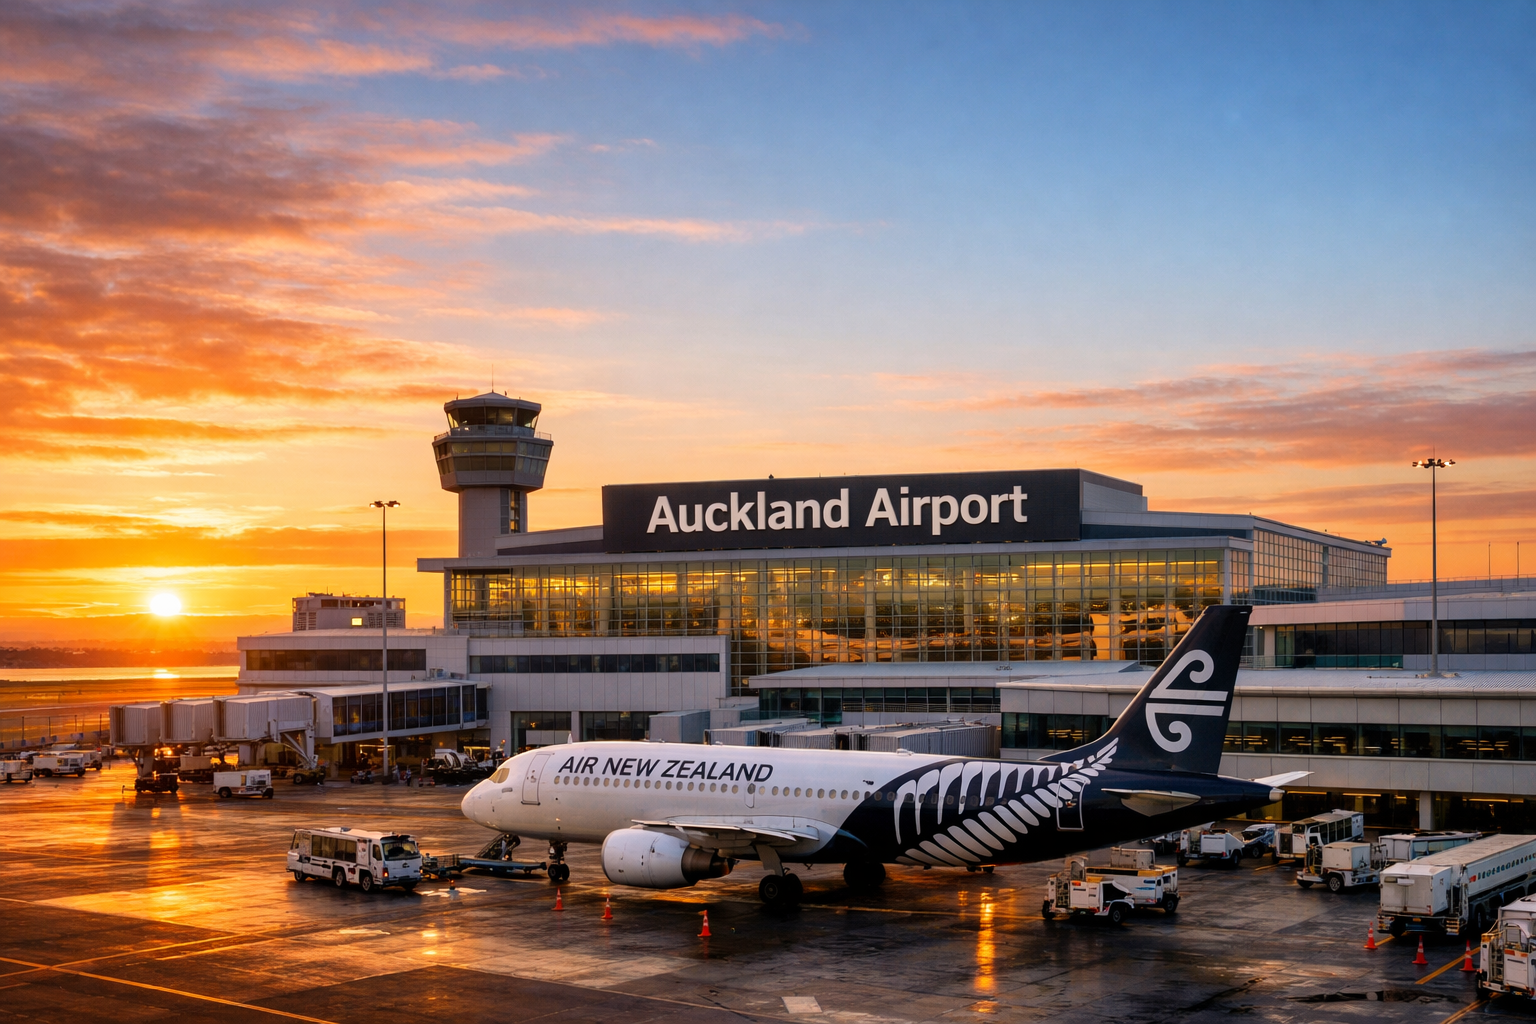

When traveling to New Zealand, many visitors arrive at Auckland Airport and then connect to a domestic flight to reach their final destination. I followed this same route—landing in Auckland and transferring to a domestic flight bound for Queenstown.
For first‑time travelers, however, the transfer process at Auckland Airport can raise a few questions:
- How do you move from the international terminal to the domestic terminal
- Do you need to collect your checked baggage or is it transferred automatically
- How much time should you allow for the connection
- Are there places to eat or relax during the layover
These points are relevant no matter which city you’re connecting to—whether it’s Queenstown, Wellington, Christchurch, Dunedin, Nelson, or any other domestic destination.
In this article, I’ll walk you through the exact process I experienced when transferring from an international arrival to a domestic flight at Auckland Airport. This guide covers everything you need to know—transfer steps, timing, baggage handling, and dining options—so even first‑time visitors can navigate the airport with confidence.
If you’re planning to continue your journey to another destination within New Zealand, this guide will help you clearly visualize the entire process from the moment you land to boarding your domestic flight.
Let’s start with an overview of how the international‑to‑domestic transfer works at Auckland Airport.
Overview of the International‑to‑Domestic Transfer at Auckland Airport
Transferring at Auckland Airport can feel a bit confusing if it’s your first time. After arriving on an international flight, you’ll go through several steps—immigration, baggage handling, and moving between terminals—before boarding your domestic connection.
The good news is that once you understand the overall process, the actual flow is very straightforward. In this section, we’ll start with a clear overview of how the transfer works. After that, we’ll walk through the layout of the terminals and highlight common concerns along with practical tips to help you navigate them smoothly.
Is the Transfer Complicated? A Quick Overview of the Entire Process
Although the international‑to‑domestic transfer at Auckland Airport may seem complicated at first, the actual process is quite straightforward. In reality, it follows a simple sequence:
Arrival → Immigration → Baggage Claim → Customs → Transfer to Domestic Terminal → Re‑check Baggage → Security Screening → Board Domestic Flight
Let’s take a quick look at the overall steps:
- Arrive at Auckland Airport on your international flight
- Go through immigration
- Collect your checked baggage
- Clear customs
- Move to the domestic terminal (on foot or via the free shuttle)
- Re‑check your baggage for the domestic flight
- Pass through domestic security screening
- Board your domestic flight and continue to your final destination
Once you understand this basic flow, you’ll find that the transfer process is very easy to follow on the day of travel. In particular, knowing how your baggage is handled and how to move between terminals will make the connection much smoother.
We’ll cover these points in detail in later sections, so for now, just keep the overall process in mind.
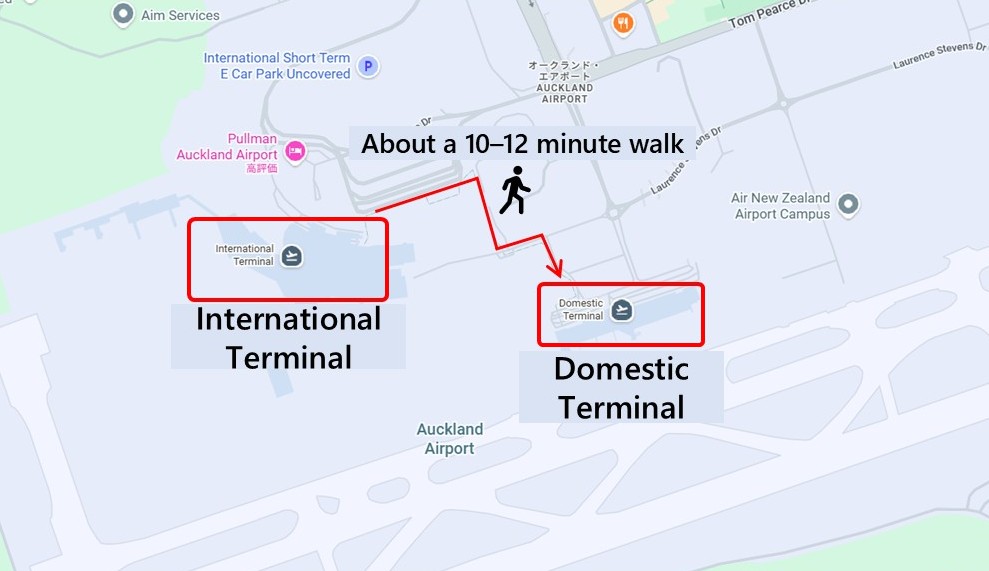
Terminal Layout and Transfer Time Between the International and Domestic Terminals
Auckland Airport has two separate terminals: the International Terminal and the Domestic Terminal. Although they are located in different buildings, both are within the same airport grounds. You can move between them either on foot or by using the free shuttle bus. As a general guideline, walking takes about 10–12 minutes, while the shuttle ride takes around 5 minutes.
I chose to walk, and the route was very easy to follow. The signage is clear, the path is flat and suitcase‑friendly, and many travelers walk the same way, creating a natural flow toward the domestic terminal. Even if it’s your first time, simply following the signs—or the crowd—will get you there without any confusion.
After a long-haul flight, walking outside in the fresh air felt surprisingly refreshing. It was a nice way to get my body moving again and enjoy my first breath of New Zealand air. If you have enough time between flights, I personally recommend taking the walk.
That said, if you’re carrying a lot of luggage, the weather isn’t ideal, or your connection time is tight, the free shuttle bus is the safer choice. The shuttle departs from just outside the international terminal and takes you directly to the front of the domestic terminal, making the transfer quick and stress‑free.
Common Concerns for First‑Time Travelers and How to Handle Them
While the international‑to‑domestic transfer at Auckland Airport becomes very straightforward once you’re familiar with it, first‑time travelers often have a few concerns. Below are the most common worries and some high‑level tips to help you stay calm and navigate the process smoothly.
One of the biggest questions is whether you need to collect your checked baggage after arriving internationally. The procedure can vary depending on the airline and how your ticket was booked, so it’s understandable to feel unsure. Fortunately, the airport signage and staff guidance are very clear, so simply following the instructions will usually lead you in the right direction. We’ll explain how to determine your baggage situation in detail in a later section.
Another common concern is the distance and route between terminals. Although the international and domestic terminals are in separate buildings, the path is well‑marked, and you can choose to walk or take the free shuttle. If you have plenty of time, walking is perfectly fine; if you’re in a hurry, the shuttle is the better option. Either way, the transfer is easy once you know what to expect.
Another common concern is whether the connection time will be enough. I personally allowed three hours just to be safe, but in reality, the entire process took much less time. In most cases, around two hours is plenty, although this can vary depending on how busy the airport is. Knowing the general flow ahead of time makes it much easier to stay calm and move through each step confidently. We’ll go into more detail about recommended connection times in a later section.
Some travelers also worry about getting lost inside the airport. In practice, Auckland Airport is very easy to navigate. There are plenty of clear signs, and the staff are friendly and helpful—if you’re unsure about anything, you can simply ask and they’ll point you in the right direction.
This chapter covered the key concerns at a high level. In the following sections, we’ll dive deeper into each point so you’ll know exactly what to expect during your transfer.
Estimated Time Required for the International‑to‑Domestic Transfer
When transferring from an international flight to a domestic one, the question most travelers worry about is “How much time do I actually need?” Because the process involves several steps—immigration, baggage claim, customs, and moving between terminals—it can be difficult to estimate the required time if it’s your first visit.
In reality, however, the transfer often goes more smoothly than expected. I allowed three hours just to be safe, but the entire process took less time, and I felt that even a shorter connection would have been fine.
In this section, we’ll break down the typical time requirements and the factors that can affect them, so you’ll have a clear idea of how much connection time is enough to feel comfortable.
General Recommended Connection Times (Official Guidelines & Traveler Averages)
For international‑to‑domestic transfers at Auckland Airport, most airlines and travel websites recommend allowing 2 to 3 hours. This guideline is designed to give travelers enough time to complete immigration, collect baggage, clear customs, and move between terminals—even during busy periods.
Traveler reports generally support this. Many people say that 2 hours was plenty, especially during off‑peak times when lines are shorter and the process moves quickly. However, during peak hours—such as early morning or late afternoon—or when immigration queues are longer than usual, a 2‑hour connection can feel a bit tight.
For most travelers, a practical rule of thumb is: “2 hours is usually fine. If you want extra peace of mind, aim for 2.5 to 3 hours.” This chapter covers the average recommended times, and in the next chapter, I’ll share my own experience to give you a more concrete sense of what to expect.
Actual Time It Took Me.
When I transferred from an international flight to a domestic one at Auckland Airport, it took me roughly 1.5 hours from the moment I stepped off the international flight to reaching my domestic departure gate. I didn’t measure the time precisely, but my overall impression was that everything moved much faster than expected. Immigration was smooth, my checked baggage arrived quickly, and the customs line was short. Even after stopping for a quick bite at one of the airport cafés, I still had plenty of time to spare.
Of course, this was during a relatively quiet period, which definitely helped. During peak times—such as early morning or late afternoon when multiple flights arrive—immigration and baggage claim can take longer. For that reason, allowing 2 to 3 hours is still the safest option if you want peace of mind.
Step‑by‑Step Process for the International‑to‑Domestic Transfer at Auckland Airport.
The process of transferring from an international arrival to a domestic flight at Auckland Airport involves several steps: immigration, baggage claim, customs, moving to the domestic terminal, and going through security. If it’s your first time, you might feel unsure about where to go or how your luggage will be handled, but the signage is clear and easy to follow. As long as you stay calm and follow the directions, you won’t get lost.
In this section, I’ll explain the exact route I took—from arriving at the international terminal to reaching my domestic boarding gate. I’ll walk you through what to expect at immigration, how to handle your checked baggage, what happens at the domestic terminal security checkpoint, and how to spend your time before boarding. These details will help you feel more prepared and at ease.
If you visualize the flow as you read, your first transfer at Auckland Airport will feel much smoother and far less stressful.
The process from immigration to baggage claim.
After getting off your international flight, the first place you head to is Immigration. Auckland Airport has clear signage, and if you simply follow the flow of people, you won’t get lost. When I arrived, I was able to reach immigration smoothly without any confusion.
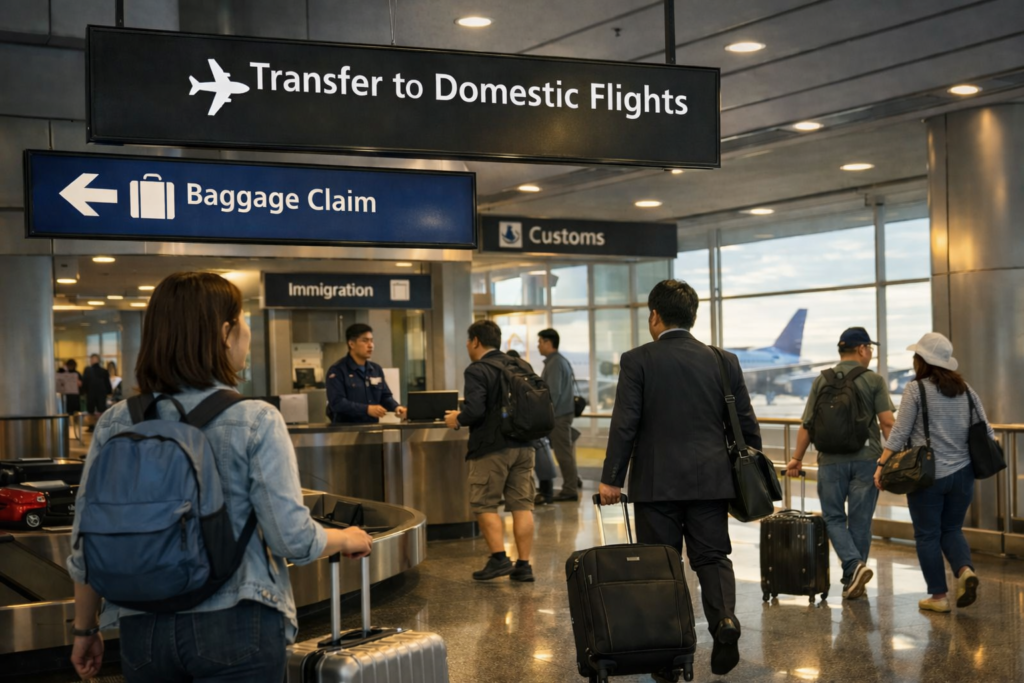
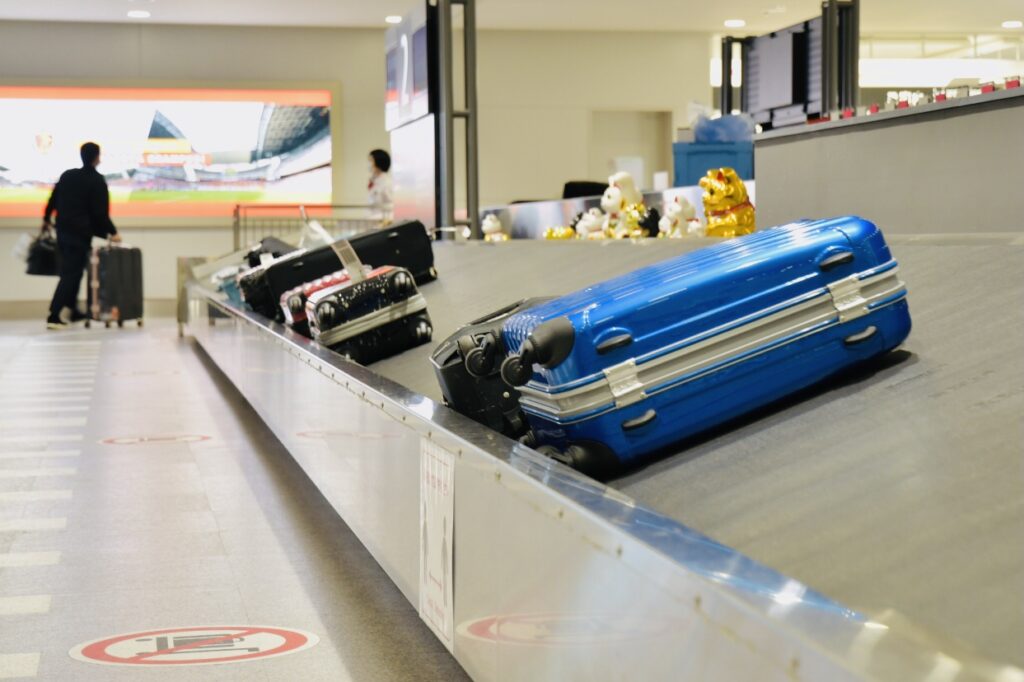
Once you finish immigration, you proceed to Baggage Claim to pick up your checked luggage. In New Zealand, the basic rule is that even if you are connecting to a domestic flight, you must collect your bags after arriving on an international flight and take them through customs. I also picked up my luggage at this stage.
In some cases, if your baggage tag shows something like “AKL → (domestic airport code),” your luggage may be checked through to your domestic destination. However, most travelers will still need to collect their bags here once before customs.
Whether your luggage is checked through or not depends on the airline and how your ticket was booked. If you’re unsure, the check‑in staff at your departure airport or the airport staff upon arrival can confirm it for you right away. They are very helpful, so don’t hesitate to ask if you feel uncertain.
Clearing customs
After picking up your checked luggage, you proceed to Customs. New Zealand is known for its strict rules on bringing in food and plant products, but as long as your declaration is accurate, the process is very straightforward.
At customs, you’ll present the QR code from your online NZTD (New Zealand Traveller Declaration) or your paper arrival card. The NZTD can be submitted easily from your smartphone or computer, and completing it in advance through the official website makes the process smoother.
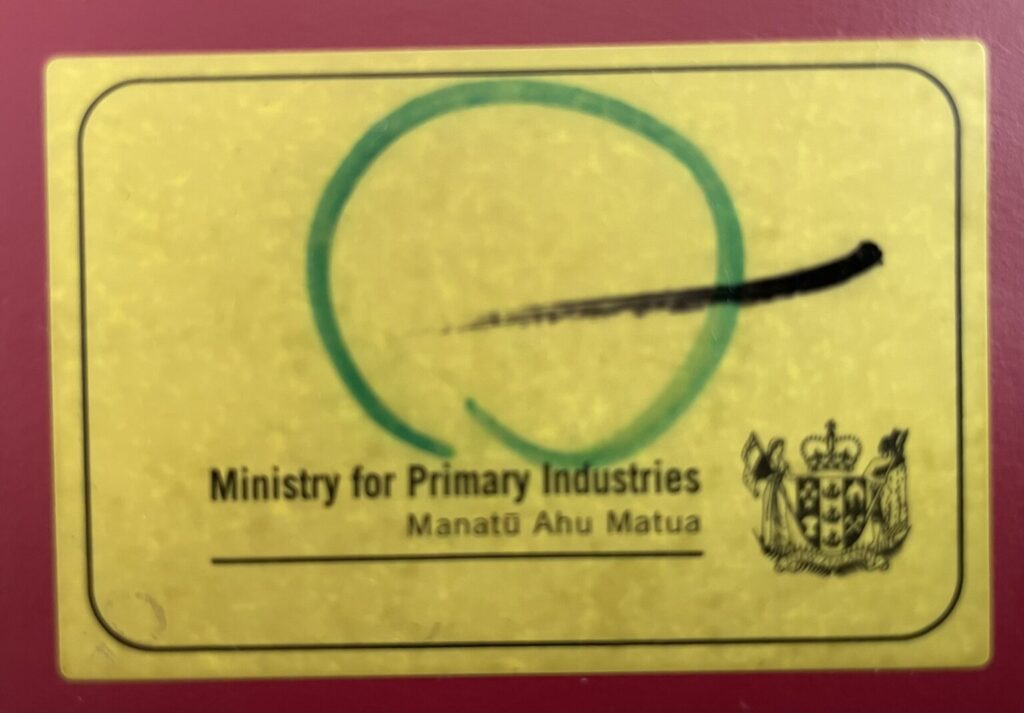
When you line up, you’ll choose between the “Something to Declare” and “Nothing to Declare” lanes. The signs are clear, and staff members guide travelers, so there’s no need to worry about choosing the wrong line. If you go through the “Nothing to Declare” lane, an officer will place a green circular sticker on the back of your passport. This is simply a marker for later checks—there’s nothing you need to do, and you can continue walking as directed.
When I was waiting in line, a biosecurity dog was walking around checking the smell of passengers’ bags, which felt very characteristic of New Zealand.
After clearing customs, you exit into the arrivals area of the international terminal. From here, you follow the same steps described in the previous section to move to the domestic terminal and continue to domestic check‑in.
Rechecking your luggage for the domestic flight
After clearing immigration, collecting your luggage, and passing through customs, you then move to the domestic terminal and recheck your bags for your domestic flight. In my case, I walked to the domestic terminal with the carry‑on suitcase I had picked up from the international baggage claim and checked it in again at the domestic check‑in counter.
Sometimes your domestic boarding pass is issued together with your international one at your departure airport, but at Auckland Airport the basic flow remains the same: pick up your luggage → clear customs → recheck your bags for the domestic flight.
Once you arrive at the domestic terminal, simply follow the signs to your airline’s counter and check your luggage just as you would for any other flight.
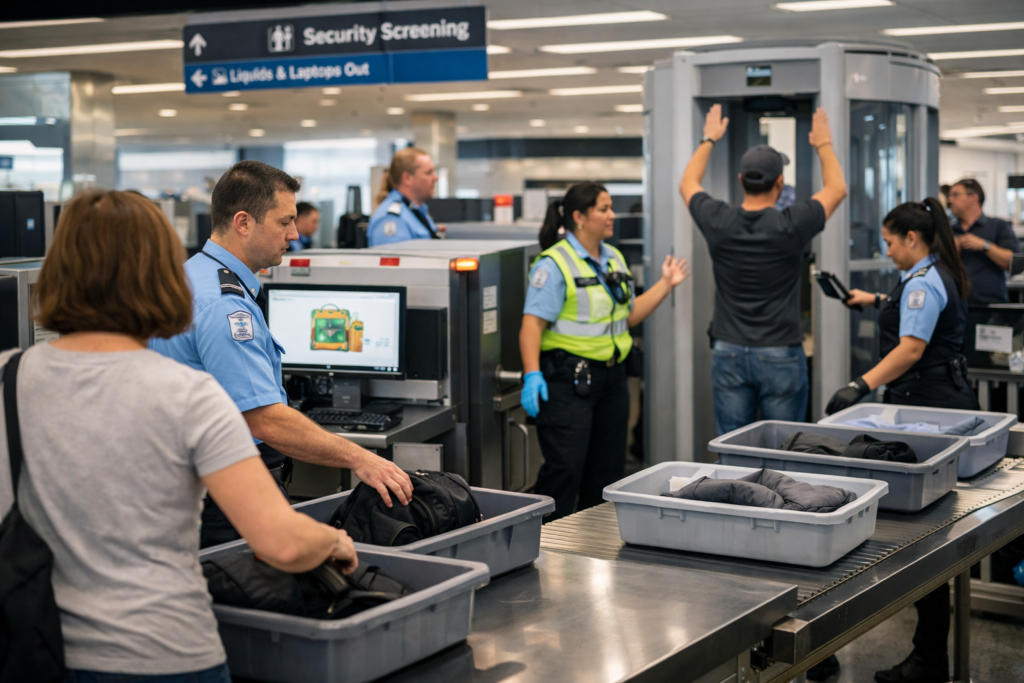
Characteristics of the security screening for domestic flights
Security screening for domestic flights at Auckland Airport follows slightly different rules compared to international departures. While the procedures are not as strict as those for international flights, there are a few things worth knowing to help you move through the checkpoint smoothly.
1.Minimal restrictions on liquids
There is no 100ml liquid restriction for domestic flights, and you can bring bottled drinks through security without any issues. I also passed through with a regular bottle of water in my hand. However, if you’re carrying a large amount of liquid or something with a high alcohol content, staff may check it at their discretion.
2.Laptops generally need to be taken out of your bag
While some airports allow you to keep your laptop inside your bag, at Auckland Airport you are often asked to take out your laptop or tablet before screening. During busy times, staff frequently remind passengers by saying things like “Laptops out, please.”
3.You’ll need to remove jackets, belts, and metal items
Security screening for domestic flights tends to be a bit stricter when it comes to metal items. You’ll be asked to place belts, watches, jackets, and anything in your pockets into a tray before going through the scanner. It’s not as strict as international screening, but it’s definitely more thorough than what some travelers might be used to.
4.Certain times of day tend to get crowded
I didn’t experience any crowds myself because I was traveling at a different time of day, but it’s said that Air New Zealand’s domestic flights tend to be concentrated in the morning. As a result, the security checkpoint can get temporarily busy between around 7:00 and 10:00.
5.Staff are generally friendly
Staff tend to speak to passengers more frequently, offering casual guidance like “Laptops out, please” or “You’re fine to go through.” The atmosphere is friendly, so there’s no need to feel tense.
Food and drink options in the domestic terminal
The domestic terminal at Auckland Airport has food and café options both before and after security. While the selection isn’t as large as in the international area, you’ll find plenty of convenient cafés and light‑meal spots that are easy to use even if you only have a short wait.
■ Before security
There are several places to grab coffee or a light meal before going through security. When I visited, I had a quick bite at a sushi spot inside the domestic terminal’s food court. They offered familiar options like rolls and nigiri, making it a great choice when you want something tasty but not too heavy.
■ After security
There are also places to eat and drink after passing through security, so it’s no problem if you prefer to clear screening first and then grab something. You’ll find sushi shops (with rolls and nigiri), light‑meal chains offering sandwiches and salads, cafés with good coffee, and bakeries selling pies and sweets — all easy to use even when you don’t have much time.
The domestic terminal is compact, so every shop is only a few minutes from the boarding gates.
Because restaurant lineups can change depending on the season, you can check the latest information on Auckland Airport’s official website.
That’s everything for this guide. Before my own connection, I was a bit worried about whether I’d make it in time, but once I actually went through the process, it was surprisingly smooth and there was nothing to stress about. Auckland Airport has clear signage, and the domestic terminal is compact, making it easy to navigate even on your first visit.
If you know the security flow and where the food options are ahead of time, you’ll be able to spend your connection time with even more confidence.
I hope this article helps anyone planning to travel within New Zealand. Wishing you a wonderful trip.